Recent Posts

Sunday, August 8, 2010

Carrabba’s Tastemaker Event

DSC03829


On Saturday, I had the opportunity to attend a Tastemaker Event in Huntersville, North Carolina, sponsored by Foodbuzz and Carrabba’s Italian Grill. I also got to bring a guest, so I asked my friend Staci, who lives in the Huntersville area.

First, we met the owner and our host for the afternoon, Marci Lambert. Marci told us a little about herself, describing her journey from Carrabba’s server to proprietor of the Huntersville location.


DSC03833


Then we met Mike Brannock, who led the cooking demonstration for us. Mike is a Food Tech for Carrabba’s and works for twenty-five different locations developing recipes and integrating new quarterly specials for the restaurants.


DSC03839


Mike told our group some of the history behind Carrabba’s before beginning the cooking demonstration. Did you know that Carrabba’s originated in Houston, Texas and that the style is Sicilian Italian? Or, that all of their food is made in house? Also, they still use many of the original owner’s recipes, including their sauces and bread crumbs.

The first recipe that Mike prepared for us was pesto. Carrabba’s uses only Genovese basil (12-15 lbs. per week), and Mike said the best way to prepare it is to cut the herbs with a knife before adding to the food processor for a more consistent texture. He then added pine nuts, walnuts, garlic, butter, salt & pepper (always freshly ground) and olive oil and processed the mixture. The consistency of the pesto was fairly thin at first, but Mike thickened it by folding in freshly grated Romano cheese at the end.


DSC03836 Pesto and Caprese Salad ingredients


After the pesto was prepared, Mike and the kitchen staff made beautiful tomato caprese salads for us to enjoy:


DSC03851


I added a little balsamic vinegar to mine about halfway through for a little extra acidity, and the pesto was delicious! Staci and I both agreed we could eat it alone with a spoon.

Next up were two of Carrabba’s sauces, marinara and pomodoro. Mike started the marinara by sweating anchovy, garlic and onions in pomice olive oil (pomice is used for high-heat cooking, which extra virgin should be more of a finishing oil), then added scallions, red wine, oregano, chopped tomatoes and crushed red pepper. He explained that the sauce shouldn’t be overly spicy but that the red pepper will add a slight heat to finish the taste. Pomodoro is a simpler, sweeter sauce that has larger chunks of tomatoes.

After the sauce demonstration, we got to choose between two entrees – Tag Pic Pac or Linguine Pescatore.


DSC03831


Staci and I both chose the Tag Pic Pac with added shrimp. “Tag” is short for tagliarini, which is a flat pasta that is thinner than fettuccini. Mike told us that pastas were often named after what the look like, such as linguine means “tiny tongues” and spaghetti means “small cords.” He also said that Carrabba’s uses only imported dried pastas from Italy because Italians still use the traditional method of air drying pasta that creates a much better product.


DSC03867Tag Pic Pac

Next, Mike showed us the preparation for Penne Franco, which includes olives, artichokes, mushrooms, sun-dried tomatoes and garlic in a simple oil and garlic based sauce. I was very excited because those are all some of my favorite ingredients, and also because we each got an order of Penne Franco to take home!

DSC03870 Penne Franco ingredients


Penne Franco is finished with ricotta salata cheese rather than Romano like most of Carrabba’s other dishes. Ricotta salata is ricotta that has been salted and allowed to dry into a hard grating cheese rather than the fresh, spreadable version you usually see.


DSC03872

Penne Franco with ricotta salata cheese


We ended the afternoon with a mini version of the Dessert Rosa, which includes butter cake layered with strawberries, sliced bananas, pineapple, vanilla pudding, Cool Whip and a chocolate drizzle. Yes, I said Cool Whip – they keep in the restaurant for only this dessert, because it was in the original recipe, but they make fresh whipped cream for their other dessert selections.


DSC03875

Finally, we ended the afternoon with some questions for Mike and received our take-out goody bags. Mike really loaded up the bags, too – we each got a serving of Penne Franco, a loaf of bread with two containers of spice blend and olive oil, a huge container of mixed olives and a small container of pine nuts.

I had a fantastic time and want to thank Marci, Mike, Foodbuzz and Carrabba’s Italian Grill for a great experience!

P.S. – You want to know what is in Carrabba’s bread dipping spice blend? Well, it’s fresh garlic, parsley, basil, rosemary, kosher salt, black pepper, crushed red pepper, granulated garlic, and oregano! Mix some up and give it a try!

Thursday, May 27, 2010

Hi everyone!

Guess what, everyone!

That’s right…Scott and I bought a new house! Originally, we planned to renew our apartment lease and purchase a home next year. However, we started investigating the First-Time Homebuyer Tax Credit in mid-March and decided just to go for it! Over the course of just three weeks, we applied for a home loan, looked at many house around the city with our fantastic realtor Crystal, and signed a purchase agreement the first weekend in April. Since then, it’s just been a blur of collecting documents, making many phone calls and sending a ton of emails, signing our life away and moving. Whew!

We have been in the house for two weeks now and although we are not unpacked 100%, I finally feel like I’m settling down a little. I am SO excited to have a real kitchen with WINDOWS and NATURAL LIGHT. Expect some new recipes soon. We were also fortunate enough to make this all happen just before our first anniversary. More on that this weekend…

I’m also extremely excited about this:

IMG_3991My new square foot garden!

Close-ups:

IMG_3994 Tomatoes (Roma, Cherokee Purple, Yellow Pear)

IMG_3995 Cucumbers (Burpless Hybrid)

IMG_3997 Peppers (Green Bell, Red Bell, Mexibell, Jalapeno)


I can’t wait to share more from the garden throughout the summer months. Here’s to creating some fresh garden-to-table recipes in the future!

Do you have a garden? What are you growing this year?

Wednesday, March 3, 2010

CEiMB: Peppercorn Pork with Wine Sauce

CEIMB


Hi everyone! So, I’m back today with the latest CEiMB pick, hosted by… ME! For this week, I chose the Peppercorn Pork with Wine Sauce from Ellie’s book The Food You Crave. I will add the original recipe at the end of the post, or you can click over to the Food Network where it is listed as Pork au Poivre.


peppercorn pork


I chose this recipe mainly because I LOVE black pepper. I put a generous dusting of it on almost every savory dish I cook, and I like to find the flavor in unexpected foods (such as Starbucks Chai lattes, yum!). I also chose this one because it seems like we don’t feature many pork recipes in the CEiMB group and I don’t cook it very often otherwise. I decided this would be a good challenge.

I liked this recipe because it had a short, simple ingredient list and was quick to prepare. Scott really enjoyed it, so much that he ate 2 1/2 servings! I thought there would be leftovers, but for the first time since I joined the group there were none.

The only change I made was to add around 1 T. sugar to the wine sauce because it was a little bit too acidic and bitter for my tastes, but I think that was a result of the wine I used rather than a glitch in the recipe.

I served this with roasted asparagus and mushrooms (which had a nice, earthy flavor that I thought paired well with the pork) and butternut squash casserole. The casserole is a recipe I picked up after a demonstration at Williams Sonoma, and I will post it soon since it has been a huge hit in our family.

I hope everyone in CEiMB enjoyed this recipe. Thanks for letting me host this week!

Peppercorn Pork with Wine Sauce
Serves 4

- One 1 1/4 lb. pork tenderloin, trimmed
- 1 t. Dijon mustard
- 1 T. black peppercorns, coarsely ground or crushed
- 2 t. olive oil
- 1/2 c. low-sodium chicken broth
- 1/2 c. dry red or dry white wine
- salt to taste

Slice the tenderloin open lengthwise, being careful not to cut through to the other side. You want to split the meat into one large, flat piece. Spread the mustard over both sides of the meat and rub in the pepper, pressing gently so it adheres well. Cut the meat across into four even portions.

In a large skillet, heat the oil over medium heat until hot. Put the tenderloin in the hot pan and cook, turning once, until an instant-read thermometer inserted into the thickest part registers 155 degrees F, about 10 minutes total. Transfer the meat to a plate and tent with aluminum foil to keep it warm.

Add the broth and wine to the pan and cook over medium-high heat, scraping up any browned bits that have stuck to the bottom. Continue to cook until the sauce has reduced to about 1/2 cup, 8-10 minutes. Pour the sauce over the meat, season with salt, and serve.

Saturday, February 6, 2010

CEiMB: Curried Chicken Salad

CEIMB


I’m late in posting my weekly CEiMB recipe because, quite frankly, I was hesitant to make it. For one thing, I was less than impressed with the last chicken salad we made. Also, I didn’t know if I would like curry powder, even though I recently discovered a love of Indian food.

I reconsidered, though, after reading through the recipe and realizing that it is not that different from my standard chicken salad. It is basically the same, except substituting almonds for walnuts and adding both curry powder and cilantro. Plus, I have heard about the popularity of curried chicken salad and even saw an episode of Barefoot Contessa where Ina Garten prepared it, so I gave it a try.

On a side note, I LOVE Ina Garten’s food. I think her show is a little very unrealistic and it drives me a little crazy (seriously, who entertains that much and has that many male friends?), yet I watch it daily and have prepared her food on many occasions.

Back to CEiMB: this week we were hosted by Sarah of Sarah’s Kitchen Adventures. To see the recipe, click here or visit Sarah’s blog.


curried chicken salad 1


I skipped the first part of the recipe, which called for poaching the chicken in chicken broth. I just pulled some frozen chicken breasts out and boiled them in water. I also did not toast the sliced almonds, but that was only because I forgot to do it!

Overall, I was pleased with the result of this recipe. The curry powder was not overwhelming but added a spicy warmth to the salad. I also liked the cilantro in the recipe because it made the chicken salad taste very fresh. I think this may be a permanent addition to my chicken salad, curried or not.

I ate the chicken salad as pictured, over greens, but I think it would be much more filling as a traditional sandwich. I also liked Sarah’s suggestion to serve it with pita chips, which I may try with the leftovers.

Thank you, Sarah, for a great CEiMB pick!

Tuesday, February 2, 2010

My Favorite Chili

chili 1

I thought this would be an appropriate recipe to go with the weather we have had in North Carolina lately – it started last Friday night with heavy snow and low temperatures and continued today with freezing rain that fell on top of the still icy roads. I have been out of work for the past two days and haven’t even started my car since last Friday afternoon. Since I’m someone who really likes to get out of the house, you know that is some pretty bad weather.

Tomorrow I have to go back to work (although the students will still be out), and I pulled some of this chili out of the freezer to take with me for lunch. Usually when I make this chili, it will yield two large servings for Scott and I to enjoy for dinner and three smaller portioned lunches for me to take to work.

When it comes to chili, for a long time I did not have a consistent recipe. It was something that I would play around with and had a different result every time. A few months ago, however, I made the best batch to date and immediately wrote the recipe down. Since that day, it has been my go-to recipe.


My Favorite Chili

- 1 T. olive oil
- 1 lb. lean ground beef
- 1 large onion, diced
- 2 cloves garlic, minced
- 2 T. chili powder
- 1 T. hot Mexican chili powder
- 1 t. black pepper
- 1 t. salt
- 1 12 oz. beer (I use Blue Moon.)
- 2 15 oz. cans chili beans (I use one mild, one medium.)
- 1 15 oz. can crushed tomatoes


beans beer

spices

tomatoes


Brown the beef, onion, and garlic in the olive oil over medium high heat and then drain:

chili 2


Then add in the seasonings and stir until fragrant:

chili 3


Pour in the beer, let it come to a boil, then reduce heat and simmer until the liquid is reduced by half:

chili 4

chili 5


Add in the beans and tomatoes and let simmer for at least 30 minutes so the flavors can combine:

chili 6


Serve plain or with toppings (I like diced red onion and cheddar cheese).

Enjoy!

Friday, January 29, 2010

CEiMB: Emerald Stir-Fry with Beef

CEIMB


Hi everyone! First of all, thank you to everyone for the sweet comments on my Foodbuzz 24, 24, 24 post. I appreciate the feedback!

I’m really trying to get back on track with cooking and posting for CEiMB. I skipped last week for two reasons: 1) I was getting ready for my cooking party, and 2) I knew Scott wouldn’t eat the Five Layer Mexican Dip and I didn’t want a whole pan of it tempting me over the weekend. Looking back, I could have made it for dinner for my friends since we also had tacos. As the infamous “they” say, hindsight is 20/20.

This week, our group was hosted by Alyssa of Alyssa’s Two Bites, who has a lovely blog if you haven’t checked it out.

I was really looking forward to this week’s recipe, Emerald Stir-Fry with Beef. I love green vegetables, and this one included some that I normally do not add to stir fries – specifically asparagus and edamame. However, this ended up being a nice combination that also included broccoli (my favorite!) and snow peas.


emerald stir fry 1


I will admit that I did not follow the measurements of the vegetables exactly, but I did mix the mirin-soy-orange sauce exactly according to the recipe. I know some of the other CEiMB members found the sauce to be a little bland, but Scott and I both enjoyed it very much. I thought it was sweet but had a little heat from the addition of crushed red pepper flakes. I do think the recipe would benefit from a small amount of salt, which I am sure Ellie left out of the recipe due to the amount of soy sauce called for, but with the amount of fresh vegetables in the recipe I think it needs some added in.

I do plan on making this dish again. It was quick, easy, and flavorful and a good vehicle to get some fresh veggies into my husband. As he said, “I wasn’t too enthused when I first looked at it, but it is delicious!”

I also loved Alyssa’s idea to make the stir-fry with shrimp and to marinate it in the sauce while the vegetables cook. I will definitely try that next time!

Thanks to Alyssa for a great CEiMB pick!

Wednesday, January 27, 2010

Don't forget!

Today is the Online Bake Sale for Haiti! There are many great items available, so please consider making a bid or donation. Again, all proceeds are going to the American Red Cross.

The auction will end tonight at 10:00 p.m.


Sunday, January 24, 2010

Foodbuzz 24, 24, 24: Stock the Kitchen

Each month, Foodbuzz hosts 24 Meals, 24 Hours, 24 Blogs where they highlight a group of meals that happen on the same day. I always enjoy reading these posts and have tried to think of creative ideas so that I could apply and participate, and I finally thought of one – and was so excited to find out I had been chosen for the January 24, 24, 24!

One of my friends from my book club was pregnant (and just had her baby last week), and the other club members and I had previously discussed creating a schedule so that we could provide meals for Cassi and her husband Hal after the baby arrived. We knew it would be a huge adjustment for them to bring the baby home, and the last thing we wanted was for them to be stressed out over preparing food.

When I started thinking about our cooking schedule, I thought it would be much more fun to turn one of our book club meetings into a cooking party! I decided to host a “Stock the Kitchen” party where we could all share a meal together and then cook several freezer-friendly and pantry stable meals for Cassi all at once.

After collecting recipes from other book club members, I went grocery shopping on Thursday night:

We started out the party evening by enjoying dinner together. When I thought about what to serve for my friends, I wanted something that everyone could enjoy but also customize to their individual tastes. So, we had a taco bar! The protein was grilled shrimp (which was coated with olive oil, paprika, a little bit of crushed red pepper flakes, and splash of hot sauce) and the toppings included lettuce, diced red onion and tomatoes, shredded red cabbage, sliced avocados, fresh cilantro and lime wedges.


taco 2


We also had white and blue corn chips, guacamole, and my 5 Minute Salsa:


5 Minute Salsa

2 large tomatoes, roughly chopped
1/2 red onion, roughly chopped
1 jalapeno, ribs and seeds removed
2 cans Rotel tomatoes, drained
a large handful of cilantro

Place the fresh vegetables in a food processor and pulse until coarsely chopped. Add the Rotel tomatoes and cilantro and pulse until everything is combined.

*I like to make this salsa at least a few hours in advance and store in the refrigerator so the flavors can combine.*

___________________________________________________

We also had some of these while we ate:


What taco bar (or party) would be complete without a margarita or two? I put my friend Sylvia on drink duty while I finished chopping the taco toppings and she mixed some excellent margaritas.

___________________________________________________

After dinner, we started preparing Cassi’s food. In the course of three hours, we prepared a large list of food and packaged it to go into the freezer (including reheating directions on each package). We made:

  • Granola
  • Spiced Carrot Muffins
  • Vegetable Soup
  • Chicken Pot Pie
  • Chicken Cordon Bleu Casserole
  • Lasagna
  • Chocolate Chip Cookie Dough


While Sylvia and I started working in the kitchen on the hot food, I set up my Kitchen Aid on the dining room table and created a baking station for Kim to work on the chocolate chip cookie dough:


After scooping the dough, Kim placed it directly in the freezer and then packed it up in a plastic zipper bag. And, of course, we baked up a few for dessert! To see the recipe for the chocolate chip cookies, please see this post.

___________________________________________________

During this time, Sylvia was cooking chicken for both the chicken pot pie and the casserole, and I was making vegetable soup:

After cooking and cooling, I ladled the soup into zipper bags in three-cup portions, labeled and stacked them, and placed them into the freezer.

Vegetable Soup
(adapted from the Weight Watchers Zero Point Soup recipe)

- 2 carrots, sliced
- 1 onion, diced
- 2 cloves garlic, minced
- 2 T. tomato paste
- 6 c. fat-free broth, either chicken or vegetable
- 4 c. shredded cabbage
- 3 small zucchini, sliced
- 1 1/2 c. green beans, either canned (drained and rinsed) or frozen
- 1 t. salt
- 1/2 t. black pepper
- 1 T. Italian seasoning

Spray a large stockpot or Dutch oven with non-stick stray and sauté the carrots, onion, and garlic over medium heat until softened.

Add the tomato paste and stir until combined.

Add all of the remaining ingredients and bring to a boil. Reduce the heat and simmer until the cabbage and zucchini are cooked through.

___________________________________________________

After the chicken cooked and cooled, Sylvia diced it into small pieces so she and Kim could assemble the chicken pot pie and the chicken cordon bleu casserole.

Chicken Pot Pie
(adapted from SparkRecipes)

- 1 lb. boneless skinless chicken breasts, cooked
- 2 cans of Healthy request Cream of Chicken soup
- 1 16 oz. bag frozen mixed vegetables, thawed
- salt and pepper to taste
- 1 cup Bisquick
- 1/2 cup skim milk
- 1 egg

Cut the cooked chicken into small bite-sized pieces. Combine with the soup, vegetables and salt and pepper. Pour mixture into a baking dish.

Mix the bisquick, skim milk, and egg and pour over the chicken mixture.

Bake at 400 for 30 minutes, until heated through and the topping is golden brown.

*We assembled the chicken base of this recipe, then froze the dish without the topping. We sent the box of Bisquick along so Cassi could add this, but we thought the topping would become too soggy in the freezing process.*

___________________________________________________

I completely forgot to take a picture of this one before we packaged it, but here is the recipe. Also be sure to read the directions Sylvia wrote on the package because they are cute and funny!

cordon blue casserole

Chicken Cordon Bleu Casserole

- 3 c. cooked chicken breast, diced
- 2 c. cooked ham, diced
- 2 c. cooked pasta shells
- 1 c. cheddar cheese, diced
- 1 can cream of chicken soup
- 1 c. sour cream
- 1/2 c. skim milk
- garlic powder
- salt and pepper

In a 9 x 13 baking dish, layer the chicken, ham, pasta and cheese. Mix the soup with the sour cream, milk and spices and pour over the layers.

Bake at 350 for 20-25 minutes until heated through and golden brown on top.

___________________________________________________


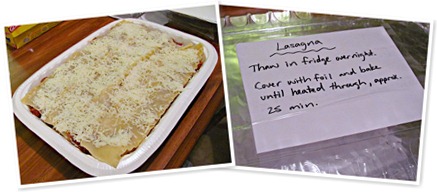
The final recipe that I made together with Sylvia and Kim was the lasagna. To make it freezable, we boiled the noodles and assembled the dish but did not bake it. If I was going to bake it and eat immediately, I would use no-boil noodles and follow the directions as written. Also, the original recipe did not call for ricotta (it was a lower-fat recipe), but Sylvia and I decided that it just isn’t lasagna without ricotta and added it anyway.


Lasagna

- 2 lbs. of lean ground beef
- one jar of marinara
- box of lasagna noodles
- 1 egg
- 1 t. Italian seasoning
- 1 15. oz container ricotta cheese
- 1 clove garlic, minced
- 1/4 c. mozzarella cheese
- 1 3/4 c. of mozzarella cheese to sprinkle on top

Brown beef and drain. Add in marinara and allow to simmer for 10 minutes.

Beat egg in a separate bowl and add Italian seasoning, ricotta, garlic and 1/4 c. cheese.

In a long dish, layer noodles, then half of meat mixture, then noodles, then egg/cheese mixture, then meat, then sprinkle with cheese.

Cover with foil, bake at 400 for 45 minutes.

___________________________________________________


In addition to providing some main meals, I wanted to include some breakfast items for Cassi. I decided to make a batch of granola (originally posted here) and Spiced Carrot Muffins that can be baked straight from the freezer.


Nutty Granola
(adapted from Ellie Krieger)

3 c. old fashioned oats
1 c. raw unsalted nuts (I used pecan chips and sliced almonds)
1/2 c. agave nectar
1/4 t. salt
1/2 t. cinnamon
1 c. raisins

Combine all ingredients except raisins and stir until everything is coated with agave nectar. Spread out on a cookie sheet coated with non-stick spray.

Bake at 275 degrees for 25-30 minutes, stirring twice during baking.

Mix in raisins and allow to cool on the cookie sheet.

Store in an airtight container for up to two weeks.

___________________________________________________

Spiced Carrot Muffins
(from Delish, adapted from Martha Stewart Living)

- 1 3/4 c. all-purpose flour
- 3/4 c. sugar
- 2 t. pumpkin-pie spice
- 2 t. baking powder
- 3/4 t. baking soda
- 1/2 t. salt
- 3/4 c. plain low-fat yogurt
- 4 T. unsalted butter, melted
- 1 large egg
- 2 1/2 c. shredded carrots

Line twelve cups (each 2 1/2 inches wide) of a standard muffin tin with paper liners; set aside. In a large bowl, stir together flour, sugar, pumpkin-pie spice, baking powder, baking soda, and salt; set aside.

In another bowl, whisk together yogurt, butter, and eggs. Make a well in the center of the flour mixture, and add yogurt mixture. Stir until just combined. Fold in carrots.

Spoon batter into prepared muffin cups. (If desired, muffins can be baked immediately in a 375 degrees oven for about 20 minutes.) Freeze until firm, about 30 minutes, then cover tin with plastic wrap, and freeze until ready to bake, up to 3 months.

Preheat oven to 375 degrees. Bake muffins (still frozen) until a toothpick inserted in center of one comes out clean, about 30 minutes. Transfer to a rack. Serve warm or at room temperature.

___________________________________________________


Finally, after all of the food was cooked, packaged and frozen, we sat down to write out the recipes on cards to present to Cassi and Hal. Even though she may not feel like cooking now, Cassi does enjoy it (I know, I’ve had her food before!) and I wanted her to be able to make these dishes again if they enjoy them.

Sylvia and I delivered the food to Cassi and Hal this afternoon and stayed for awhile to see baby Adelyn. I think they were very happy with the food and planned to make part of it right away.

I thoroughly enjoyed hosting my friends, having a great dinner, and making meals for a friend. I want to send a huge thank you to Foodbuzz for giving me the opportunity to Stock the Kitchen!

recipes 4

Thursday, January 21, 2010

Parmesan-Panko Crusted Tilapia


tilapia

I always make one trip to the grocery store and buy all of our food for the entire week at once, but my last trip didn’t happen until late in the day. So, I was looking for something to make for dinner that night that would be extremely quick to prepare but still be healthy. I decided to go with the fresh tilapia that was on sale at the seafood counter.

Once I got home, I searched the pantry and fridge for vegetables and decided to serve the fish with steamed broccoli and baked potatoes. The meal went from the grocery bag to the table in just under fifteen minutes, and the best part is that I mostly used items that were already in my kitchen.

I started by preheating my broiler and a large skillet on the stovetop. I made a mixture with 3 tablespoons panko bread crumbs, 1 tablespoon grated parmesan cheese, and 1/2 teaspoon dried parsley flakes:

tilapia prep 2


Then I topped the tilapia with salt, pepper, and lemon juice:

tilapia prep 1

Then I sprayed the skillet with a small amount of nonstick cooking spray, added the tilapia, covered it with the panko mixture, and immediately put the skillet under the broiler:

tilapia prep 3

Five minutes later, the fish was finished. I really like this method because the fish quickly cooks from both sides (the bottom in the preheated skillet and the top under the broiler), which allows it to cook evenly as well.

The bread crumb topping also adds a nice salty crunch to the top of the fish without adding all of the calories from the normal three step process of dredging in flour/egg wash/dipping in bread crumbs. There is just enough cheese in the mix to melt and allow it to adhere to the fish without the extra steps, and since the fish is only breaded on one side, it remains pretty healthy. In fact, the entire amount of the panko mixture clocks in at under 100 calories. Not too bad for breading!

I think this recipe would also work well with thicker pieces of fish, such as cod or even salmon, but I would cook it for a full minute or two in the skillet before breading and broiling. In the amount of time it would take to cook thicker fish entirely under the broiler, the panko would definitely burn.

Please let me know if you give this one a try, and I hope you enjoy!